

After a long break, a new beta version of the program was released with the number 7.0.
The development of this version took more than three months, but the work was done very much.
What’s new in version 7.0.
A new custom block editor was developed from scratch. When developing it, I took into account the wishes of users and made it based on the technology for developing embedded blocks.
Changed the ideology of the user block. Now it’s a multiblock. In other words, a single custom block includes a single block or batch of blocks.
The code in a multiblock is a hierarchical structure. There is a General code that is inserted into the program ONCE when using any block in the project. Blocks in a package can be grouped into folders and groups. Folders are used for visual separation of blocks. Groups are used for logical separation. The group also has a branch of code that is inserted into the program once if you are using in the project of any block group.
The block itself also has two sections of code. Shared code is code that is inserted into the program ONCE when any number of instances of this code are used in the project. And the instance code is the code that is inserted into the program as many times as the block is used in the program.
Each code block is divided into Declare, Setup, Loop, and Function sections. Each code section is divided into sections – the beginning of the section and the end of the section. In addition, the Loop section in the code block of each instance has a section called “block insertion Point”. This code is inserted into the program in the place where this block is installed on the diagram. You can create any number of code parts in each section, and set a condition for each part to appear in the program.
The same architecture is present in the parameters. There are General multiblock parameters. They appear in the project in the settings of all blocks in this package, and when this parameter is changed in one block (when the user configures the block in the project), they change immediately for all blocks. There are also General parameters for block groups and for each block. Each block also has parameters for each instance, which change independently for each instance of this block used in the project.
Project variables, project arrays, physical project pins, and UART ports can be used as parameters. Parameters and individual parameter characteristics can be used in conditions that specify whether a block has inputs or outputs, whether other block settings are available, and whether part of the code is used during compilation.
Standard parameters can be presented to the user as an input field, drop-down list, switch, or checkbox.
If the package contains a single block, it will be represented in the library as a normal single block. If several blocks, the width will be presented in a folder structure which is the location of the blocks therein, and the name of each unit and folders can be changed independently from the architecture multiblock, and title blocks in the editor. The same applies to the representation of parameters in a block.
You can import blocks made in the old editor to multiblock. You can also import entire libraries, but in this case only CODE blocks are imported. FBD and LAD blocks are not imported.
To distinguish between blocks made in the old and new editor, the first ones in the library are displayed with a PostScript (CODE) as before, and the second ones (Code).
My first priority now is to write a detailed help for the editor. I haven’t done it yet. To make it easier to understand what works in the editor, I made a small test block for OLED SPI displays.
Of course, it is designed to represent the editor’s capabilities, so the practical functionality of this block is a secondary issue.
However, those who create custom blocks will have to learn the new editor anyway, since the stable release of version 7. x will disable the ability to create new blocks in the old editor.
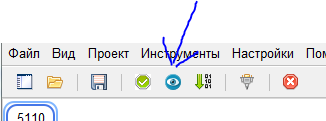
The next innovation in the program is the realtime project code viewer. For each open project, you can open the code viewer in a separate window, which will be uploaded to the Arduino IDE. To do this, click the button with the eye on the toolbar of the main program window.
For the current project tab, a window opens that displays the program code for the current project state.
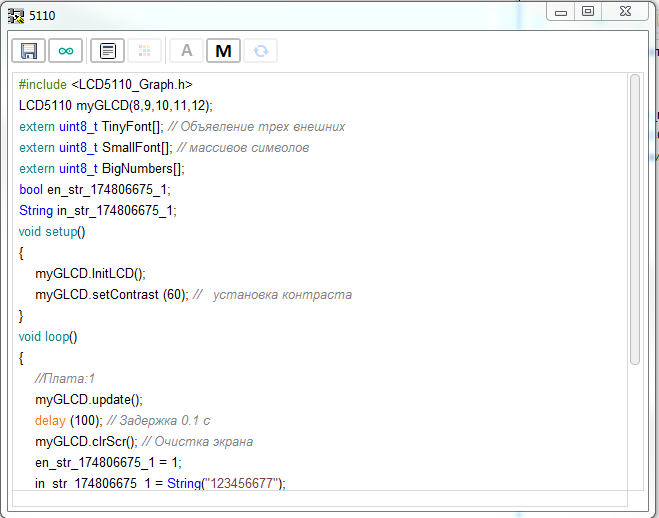
If the project is incorrect, the corresponding message will be displayed in this window. When you change the project, this window will be updated automatically. When you close the project, the window will also close.
In large projects, with a large number of lines of code, it is possible to slow down the main project window when updating the viewer window. In this case, you should first disable syntax highlighting.
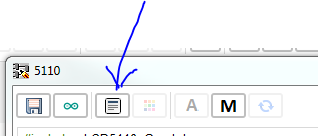
Due to the peculiarities of the programming language I work in, displaying a large amount of colored text slows down the engine. If this doesn’t help either (although I haven’t managed to slow down with syntax highlighting disabled, even on a huge project and a weak laptop), you can switch to manual mode. In this case, if there are changes in the project code, the “Update” button is activated, which allows you to update the viewer window at a convenient time.

And the last big update of the program. Automatic code formatting is implemented. It is now output to both the viewer and the Arduino IDE in formatted form. Perhaps I didn’t take into account all the subtleties of the C language, and in some cases the formatter will do its work incorrectly. In this case, you can disable code formatting in the project settings (this setting will be saved in the project). In the program settings, you can disable formatting for all newly created projects by default (you can enable this option for any project at any time).
Testing of version 7. x is scheduled for two to two and a half months. During this time, I plan to add the following functionality, which I did not have time to do for the first beta release.
- Use as parameters for the controller CPU type and Board type conditions.
- How to specify a different font for all fields of view and edit code.
- Under question (I will discuss with You) the possibility of editing library code directly in the editor. Now it is possible to view the contents of library files, editing is not difficult, but I have not yet decided for myself whether it is necessary and correct
Discussion of testing the beta version takes place here


